Friday 31 January 2014

Texture Tiliing

New Friday, new assignment! This time we're learning how to create textures and materials to use in our game. I started by creating a tile-able texture, for this i'm following this handy tutorial:
http://onlinedesignteacher.blogspot.ie/2013/02/how-to-create-seamless-texture-tileable.html

I am currently in the process of cloning the textures and it is very time consuming. This is what I got so far:

Cloning stage


Tuesday 28 January 2014

Importing Static Meshes in UDK

The level I am creating is going to be a hotel, and with the default UDK meshes it would be impossible to create a nice hotel, so I decided to import static meshes from the internet to use in my game.

Imported static mesh

Monday 27 January 2014

3D Game update

I did some more detailing on my level today, adding detail and foliage. I was trying to fix the stairs, but unfortunately UDK crashed a few times on me, but i'll continue that tomorrow.

Skybox and foliage added

Friday 24 January 2014

Final Concept Board

I made some more modifications to the final concept board stage and got much better results. The building blends in better, the bubbles colour is more lively and the text is easier to read.

Finished concept board

Tuesday 21 January 2014

Depth of view and terrain changes

Doing some more work on my map today I realized the terrain didn't look good from the distance, the player could see some holes on the map  and the textures looked too patchy. So I changed the scale of the materials in the material editor and it looked much better. I also created more sections of terrain to make the environment look more realistic.

Adding detail to the landscape

Friday 17 January 2014

Concept Board Update

I did some more work on my concept board today and the present stage is this:

Concept board for my UDK level

This is much better than the previous stage for it is more colorful, the sky background is better filled with the clouds and the beach also looks better.

3D mode in Photoshop

The newest version of Adobe Photoshop features a 3D mode for your shapes and text. In order to activate it you need to have your image mode set to RGB, then go to the 3D menu on top and select New Layer Extrusion.


3D image example

You can use this tool for 3D text also, this creates a cool effect for headings.

Example of 3D text

Wednesday 15 January 2014

Starting the level.

First day on the production stage of the game. Today I laid out the terrain and added blocked the terrain.
Starting with the set up, using landscape mode I created 4 terrain blocks with 32x32 in size forming a square. Then created the lightmass and blocking volume each just a little bit bigger than the terrain.

Basic terrain

Adding Materials in Landscape Mode

The Landscape mode was discussed previously here, but in that post I didn't cover how to add materials to your landscape terrain. This is a little bit more difficult to do than in Terrain mode.

First you need to "create" the materials you are going to use. Go to the content browser, right click anywhere then select new material, this will prompt a new screen asking where you want to create the new material. You can create a new package to save it, the select a group. After you do that, make sure you right click on the recently created package and save it.

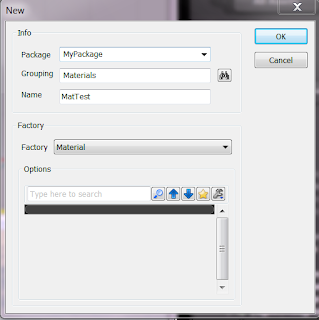
Creating new material

Tuesday 14 January 2014

Concept Board for 3D Game

My next Image Processing Assignment requires me to create a concept board for my upcoming 3D game. I will use Photoshop to do so. Since it will be printed, the file will be created in CMYK and I set a few margins for the print limit.

 First stage is to block out more or less the placement of images and text as a whole image. Simply drawing blocks for each element.
Draft

Thursday 9 January 2014

Landscape Editor

The Landscape Editor mode is very similar to the terrain mode, but it is better optimized, in the sense that it will use less memory, and it also works on mobile maps, where the terrain mode doesn't.

Landscape editor

Tuesday 7 January 2014

Boolean Puzzles

Today I set up a small puzzle involving Boolean variables. It consists of rotating wheels in the right position. It is simple and silly, but it is the base for other puzzles.

The Setup:
Boolean puzzle

Door Keys

Creating keys is a good way to get the player to go to certain areas or accomplishing something within your level. Then the player use the keys to open a door and proceed to the next area.
To do that we need a mesh to act as a key and a door animation. In this example we'll use two keys:

Trigger activating key

Monday 6 January 2014

Foliage

To quickly add small meshes, like grass, rocks or others, you can use the foliage editor, on the top left corner. It is similar to adding a texture on terrain mode. The downside to it is that it adds a lot of meshes, so it will consume a lot of memory, decreasing performance. Use it in small doses to enrich your level.

Added foliage