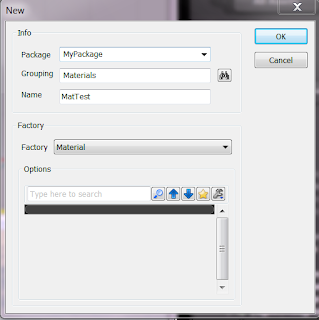
First you need to "create" the materials you are going to use. Go to the content browser, right click anywhere then select new material, this will prompt a new screen asking where you want to create the new material. You can create a new package to save it, the select a group. After you do that, make sure you right click on the recently created package and save it.
 |
| Creating new material |
Double click on your recently created material on the content browser, it will open the Material Editor. It works similarly as Kismet, linking nodes to create stuff. The node PreviewMaterial_0 is where you are going to link all the other nodes to. It has various properties, but for now we are only going to use the Diffuse and Normal channels. The Diffuse channel is basically the light the material will emit and the Normal channel is used to add depth to the material making it look like a 3D material.
Right click and select Texture-> New Texture Sample, and a texture node will appear on the editor. For this example I will use 2 textures, but you can add as many as you want to your terrain. It is, however, not recommended to use more than 5 textures. You are going to need 4 of those nodes in total, so add another 3 or simply copy and paste. 2 of these nodes are going to be used for the textures and the other 2 will be used for the normal.
 |
| Material editor |
The next node we need is located under Terrain-> New TerrainLayerCoords. The final node is also under Terrain-> New TerrainLayerWeight. Create 4 of each of these nodes as well.
 |
| All nodes necessary to create a material |
| Adding texture to the material |
Notice that after you add the textures, the nodes change accordingly.
 |
| Texture added |
Repeat this process but this time add the Normal textures. They can also be found in the content browser and will usually have their name finishing in 'N'. In the example the normal textures are DrySand_N and
T_Grass0110_9_N. With that done, name all the Layer nodes to make them easier to find later. I am going to name them respectively: Grass, Sand, Grass, Sand. The names are repeated for the normal channels.Proceed linking all the channels like in the next picture.
 |
| Linking the nodes |
We're almost done. You may notice that even with all the nodes connecter nothing is shown in the preview. That is because we need to add weight on the weight nodes to do that. You can use whatever values you want, but remember 2 things: 1) The lower layer(s) must have a smallest value than the one previous to it and 2) the Normal channels must have the same weight as the ones for the textures. I used a value of 10 for the Grass and 5 for the Sand. Apply all the changes by clicking on the arrow on the top left corner of the material editor and close it. With your material finished, make another save to the package you created and open Landscape Mode.
Now when you open Landscape mode again, go below "HeightMap" and select Add a new Layer and name the layer as you named the nodes(Grass and Sand in my case). The materials will appear on the editor and you can start painting your terrain by selecting the paint tool.
No comments :
Post a Comment